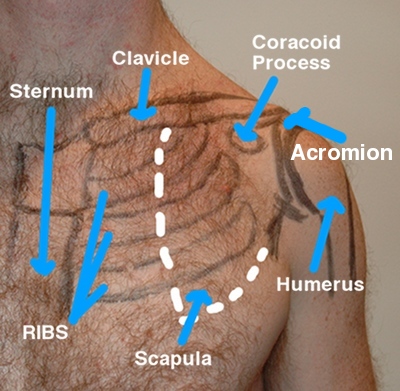
Shoulder impingement
In this installment of our “injury of the week” series we’re going to be talking about shoulder impingement.
- Swelling
- Scary purple/black bruising where the pain is.
- Numbness/tingling anywhere in the shoulder/arm.
- You can’t pick your arm up or hold it up above shoulder height.
- If this a traumatic injury, meaning you fell on it or felt a pop/tear when the injury happened.
- If you aren’t making any progress on your own.
Impingement can cause a dozen different things including: bursitis, tendinitis, bone spurs, rotator cuff tears, cartilage/bone damage, etc. The signs/symptoms listed above warrant a medical evaluation. Period.
How to treat it.
**download PDF with links, sets, reps, progressions, etc here**
Step 1- Traditional R.I.C.E. treatment:
When a new muscle injury occurs, the first and most important goal is always to decrease pain and any swelling that may be present. In other words, we want to decrease inflammation. Don’t short cut this stuff. It’s boring but it works, especially if your symptoms worsen as the day goes. For example, it’s now easier than ever to smuggle an ice pack into the office fridge and wear compression gear under your dress clothes. Use that to your advantage when working to heal an injury!
Rest: This may sound obvious, but I’m going to say it anyway. An injured muscle will require a decreased activity level to fully heal. The severity of the injury will determine if this is a full rest or more of an active recovery. For the shoulder my advice is typically to avoid overhead activities and heavy lifts. If you can’t pick it up with your elbow against your side, it’s too heavy.
Ice: while heat may feel better on stiff and sore muscles, ice only during the first 7 days following injury. This will help to decrease swelling, inflammation and pain. 10-15 minutes is sufficient and you can perform every hour as needed. Avoid direct ice to skin contact.
Compression: thanks to the recent explosion of compression sleeves, tights, shorts, etc, you have several options in this department. Ideally you want something that is snug without being uncomfortably tight. Think tight under armor or CWX shirt. If it reinforces posture by pulling your shoulders back? Even better.
Step 2- Kinesiology taping:
The taping application for impingement syndrome is designed to help pull the shoulder back into better alignment and give the injured structures space to heal.
1) Taping application. Click here.
Follow the directions for skin prep and care. This can stay on 3-5 days easy. Any signs of skin irritation? Take it off.
Step 3- Getting mobility back:
The second goal of treatment is going to be to loosen up the injured area. Below I have the treatment techniques set up in levels. As a rule, you must be able to complete #1 without pain to progress to the next level. Be smart! Healing a muscle sprain/strain isn’t about no pain, no gain. The muscle needs to heal! Don’t overdo it in an attempt to speed up your recovery.
1) R.I.C.E. + gentle stretching. There should be no pain with stretching. With this type of injury, we will need to stretch out the muscles in the back of the shoulder as well as the front and upper arm.
2) Begin using the foam roller AROUND the injured area. The goal here is to start getting slack into the muscle without aggravating the injury itself. No tennis ball work or mobilizations. The order should be foam roll around injury -> stretch -> RICE.
3) Begin using the foam roller over the injured area to tolerance. The order should be foam roll around injury-> over injury -> stretch -> RICE.
4) Begin using the tennis ball for mobilizations. The order should be foam roll around injury -> over injury -> active mobilization with the tennis ball -> stretch -> RICE.
5) Begin using the tennis ball for cross friction + trigger point. These are the deepest of the soft tissue techniques so you want to save them for last to target specific adhesions and restrictions. Consider this your fine tuning step.
How long do you need to R.I.C.E for??? Until it’s 100% gone.
Here’s what it looks like. Use the guidelines above.
Step 4: Strengthening
We’ve broken the exercises down into three levels based on pain levels. This stuff should NOT hurt. If it does, go back a level or ease up on the resistance. Only progress as pain free.
What you’ll need: 1) resistance band/tubing. This is easy to find in any sporting good store these days. You can probably even get it in walmart or target.
Optional equipment: 1) a stability ball. Same guideline as above. Very easy to find and cheap these days.
Video’s for each level are here. Please note, in the PDF download (above) you will find details for reps and difficulty progression, as well as, benchmarks you should meet before progressing to the next level. The video’s show you the basics for each exercise and what they look like.
The number one thing to remember is that these exercises should be pain free. If you’re getting discomfort, go back a level. You can’t force this injury to heal, but you certainly can make it worse if you over do it.
Level One
Level Two
Level Three
Hope that helps, and fire away with any questions in the comments section!
References
1) Capobianco, Dr. Steven and van den Dries, Greg. (2009). Power Taping, 2nd Edition, Rock Tape Inc, Los Gatos, CA.
2) Hammer, Warren. (2007). Functional Soft-Tissue Examination and Treatment by Manual Methods, 3rd edition. Jones and Bartlett Publishers, Inc, Sudbury, MA.
3) Hyde, Thomas and Gengenbach, Marianne. (2007). Conservative Management of Sports Injuries, 2nd edition. Jones and Bartlett Publishers, Inc, Sudbury, MA.
4) Kase, Kenzo, Wallis, Jim, and Kase, Tsuyoshi. (2003). Clinical Therapeutic Applications of the Kinesio Taping Method.
5) Muscolino, Joseph. (2009). The Muscle and Bone Palpation Manual. Mosby, Inc, St. Louis, MO.


This is a great and very concise article. Thanks for taking the time to explain and record the videos.